

CPP Film Masterbatch Recommendations for High-Clarity Packaging Performance
2026-08-21
High-clarity CPP packaging films often fail for a reason that gets overlooked: the masterbatch. A poorly chosen pigment or carrier resin can quietly add haze and reduce light transmission, even when the base polymer is perfect. In this guide, we share practical masterbatch recommendations for cast polypropylene film, drawing on production feedback and Xinwancai’s proven high-performance concentrates. If you want consistent clarity without trial-and-error, keep reading.
The Real Culprits Behind Haze in CPP Film
Most attempts to explain haze in cast polypropylene film start with surface roughness or the amount of antiblock, but those factors rarely account for the persistent cloudiness seen in high-clarity grades. The real culprit is usually the way light scatters at the interface between crystalline and amorphous regions. In CPP production, rapid quenching locks in a random spherulitic structure that is neither fully homogeneous nor fully separated, and this half-formed morphology creates micro-scale refractive index fluctuations far more influential than surface texture.
A second overlooked source is the mismatch in cooling rates across the film thickness. The skin layers solidify almost instantly against the chill roll, while the core cools more slowly, allowing larger or more ordered lamellae to grow. That internal gradient produces optical discontinuities that persist even after the film reaches room temperature. Add in minor variations in melt temperature, die lip cleanliness, or even the age of the raw resin, and the haze level can shift noticeably from one run to the next without any obvious change in formulation.
Fixing the problem therefore demands looking past generic additives and surface treatments. Blending resins with complementary molecular weight distributions, fine-tuning the chill roll temperature profile, and using a slightly textured roll to mask early-stage internal scatter often deliver better clarity than simply increasing clarifier dosage. In practice, the most transparent CPP films come from aligning the entire thermal history of the film with the crystallization behavior of the polypropylene, not from chasing a single villain.
Carrier Resin Choices That Keep Packaging Crystal Clear
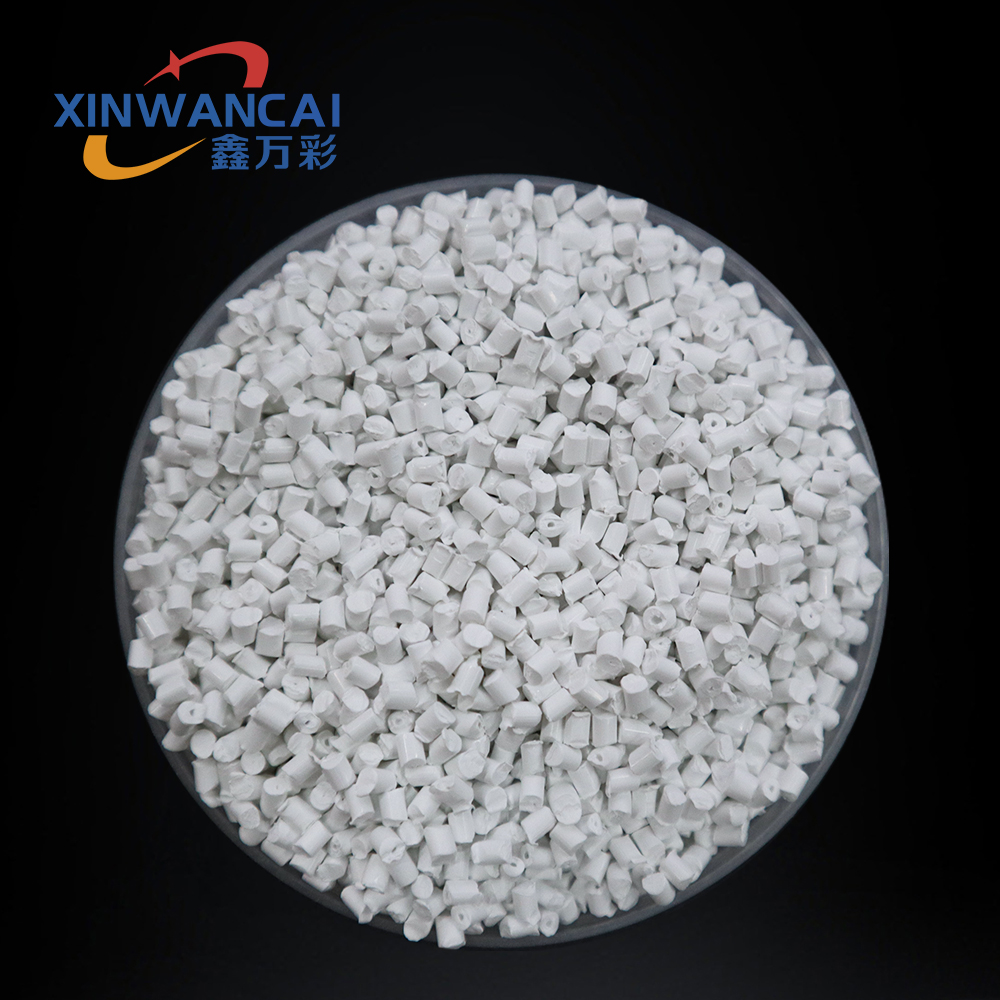
Achieving glass-like clarity in plastic packaging often starts with resin selection. Polypropylene, for instance, can vary dramatically in haze depending on catalyst technology and comonomer distribution. Random copolymers with a narrow molecular weight distribution tend to suppress large spherulite formation, allowing light to pass through with minimal scattering. In contrast, homopolymers or block copolymers create a milky appearance that works fine for opaque bottles but ruins the visual appeal of a clear clamshell or film.
For PET, the clarity story leans on intrinsic viscosity and copolymer content. Higher IV grades offer better melt strength but can introduce more crystallization during processing if cooling is uneven. Blending in a small percentage of isophthalic acid disrupts the polymer chain regularity, slowing crystallization and keeping the material amorphous. The result is a container that stays bright and transparent even after hot filling or reheating.
Beyond the base resin, additives like sorbitol-based clarifiers or phosphate ester nucleators fine-tune the optical properties of polypropylene. These agents create a dense network of tiny crystals instead of large ones, pushing haze values down to 2% or less. The best choices are often tailored to the specific converting process—extrusion, injection molding, or thermoforming—since shear and cooling rates affect final clarity just as much as the resin itself.
Dispersion Control: The Unsung Hero of Transparency
Most people assume transparency in a coating or film comes down to the raw materials themselves—pick the right resin, add a pinch of additive, and you're done. But the real magic happens at a scale few ever think about: how well the particles are separated and held apart. This is dispersion control, and it quietly decides whether a product looks like polished glass or a hazy mess. When particles clump together, even slightly, they scatter light in every direction. Break those clumps apart and keep them from re-forming, and light passes through almost untouched. It’s not glamorous work, but it’s the difference between a window you can see through and one that just looks dirty.
The challenge is that dispersion isn’t a one-time event—it’s a constant battle. During mixing, you can apply shear to tear agglomerates apart, but the moment that shear stops, attractive forces start pulling particles back together. That’s why the choice of dispersing agent and the order of addition matter far more than most formulators admit. A good dispersant wraps around each particle and creates a steric or electrostatic barrier that keeps neighbors at arm’s length. Get the dosage wrong, even by a small margin, and you’ll see the telltale sign: a slight milkiness that no amount of extra filtering will fix. In high-clarity applications—optical films, clear coats, even cosmetic serums—this invisible tug-of-war determines whether the product earns a second look or gets rejected on the spot.
What makes dispersion control the unsung hero is that nobody notices it when it works. A perfectly transparent coating doesn’t get praised for having well-dispersed particles; it simply looks clean, bright, and effortless. But the moment dispersion fails, everyone demands to know what went wrong. Process engineers tweak mill speeds, chemists re-screen additives, and quality control flags batch after batch. Yet the root cause is almost always the same: particles that found a way back to each other. Mastering dispersion means thinking like a particle—understanding its surface charge, its affinity for solvents, its tendency to settle or flocculate under temperature swings. Only then does transparency stop being a happy accident and start being a repeatable result.
When Antiblock Additives Start Working Against Clarity
Antiblock additives are usually the quiet workhorses in plastic film, keeping surfaces from sticking together when they're wound tight or stacked under pressure. But there's a tipping point where the very particles that prevent blocking begin to scatter light in ways that dull the film's transparency. You notice it as a slight haze that wasn't there before, or a milkiness that softens the crisp look of a printed label underneath. It's not a catastrophic failure, just a gradual trade-off that sneaks up on production runs, especially in thinner gauges or high-clarity applications like food packaging.
The culprit often comes down to particle size, loading level, and how well the additive disperses in the polymer matrix. Larger silica or talc particles do a great job of creating micro-roughness on the surface, but they also act like tiny lenses that bend light off-axis. If the refractive index of the additive doesn't match the base resin closely enough, every particle becomes a fog point. Overdosing to solve a blocking problem can push clarity past the point of no return, turning a crystal-clear bag into something that looks frosted. The real engineering challenge is hitting that narrow window where anti-blocking performance and optical quality coexist without leaning too far in either direction.
Some processors try to compensate by using synthetic silica with a narrower particle size distribution or switching to organic anti-block agents that deform under pressure. Others dial back the additive and accept a bit more blocking force, relying on surface treatments or lower storage temperatures instead. There's no universal fix because the right balance depends on resin type, film thickness, and end-use demands. What matters is recognizing that anti-block additives aren't free clarity insurance; they're a compromise, and once the haze creeps in, it's already too late to ignore the trade-off.
Extrusion Temperatures and Their Subtle Effect on Gloss
In polymer extrusion, barrel temperatures rarely get the same attention as die design or screw speed, yet they quietly shape the final surface quality. A rise of even five degrees near the metering zone can lower melt viscosity just enough to smooth out microscopic flow lines, which translates into a visibly higher gloss. It is not a dramatic shift—more like the difference between a freshly waxed car and one that has sat in the garage for a week—but it is there if you know where to look.
The mechanism is tied to how the melt freezes at the die exit. When extrusion temperatures run slightly above the resin's recommended range, the polymer chains have more time to relax before solidification, reducing die swell and leaving a flatter, more mirror-like surface. Run too cool, and the outer layer quenches prematurely, trapping tiny ridges that scatter light and dull the finish. Operators often mistake this for a material issue, when a small temperature bump near the adapter or die would fix it.
What makes the effect subtle is that it interacts with other variables—screw wear, moisture content, even the ambient air temperature around the take-off rollers. A gloss meter might show a change of only two or three units across a ten-degree spread, which is why many shops overlook it. But for products where appearance carries a premium, like clear tubing or cosmetic packaging, dialing in that thermal sweet spot can be the difference between a batch that looks premium and one that gets downgraded to second quality.
Formulating Masterbatch for Ultra-Thin Transparent CPP
Achieving clarity in ultra-thin cast polypropylene film hinges on how the masterbatch is built from the ground up. The carrier resin must match the film grade PP closely, but with a melt flow index pushed higher than typical to ensure rapid and even dispersion during extrusion. Even a slight mismatch in viscosity creates micro-domains that scatter light, turning a supposedly transparent film hazy. We lean toward random copolymer PP carriers with narrow molecular weight distribution, as they withstand the shear stress of thin-gauge processing without degrading into gel specks.
Pigment or additive choice is equally unforgiving. In films under 12 microns, any particle above roughly one-tenth of the film thickness becomes a visible defect and a tear initiation point. This pushes formulation toward surface-treated nano-scale additives—slip agents, anti-blocking silica, or organic clarifiers—dispersed not just by twin-screw compounding but by a secondary high-shear milling step. The goal is a masterbatch where every additive particle rides below the wavelength of visible light, so the film retains both transparency and puncture resistance.
Dosing accuracy separates a good masterbatch from a failed trial. Ultra-thin CPP has almost no room for let-down ratio errors; a shift of 0.5% in masterbatch feed rate changes haze by a visible margin. Formulators avoid single-pigment concentrates for critical runs, preferring pre-dispersed multifunctional batches that combine slip, anti-block, and processing aid in one pellet. This reduces the number of dosing variables and keeps the extruder barrel temperature profile lower—critical because ultra-thin film quenches fast, and any residual thermal stress from overheated masterbatch shows up as curl or uneven gauge.
FAQ
For high-clarity CPP, polymer-bead antiblocks and high-purity synthetic silicas with narrow particle size distributions tend to outperform conventional natural silica. They create fewer large agglomerates, so light scattering stays low while still preventing film-to-film blocking. The key is matching the refractive index of the additive to the PP matrix as closely as possible.
A workable range is often 500 to 1,500 ppm of erucamide slip and 1,000 to 2,500 ppm of a fine-particle antiblock, depending on film gauge and converting speed. Going higher usually adds haze quickly. It is better to start low, measure coefficient of friction and haze on a pilot line, then step up only if blocking or handling issues appear.
The carrier should be a high-clarity PP grade, ideally a random copolymer with a melt flow rate close to the base film resin. If the carrier has a different crystallinity or contains comonomer that changes refractive index, it can create micro-domains that scatter light. A well-matched carrier also helps the additive disperse more uniformly, which directly reduces visible haze.
This often comes from additive migration or surface roughening. Slip agents like erucamide bloom to the surface over time and can form a thin crystalline layer that increases haze. In heat-sealed areas, localized melting and recrystallization can also change surface smoothness. Using slower-blooming slip systems or lower loadings, and checking seal-bar temperature profiles, usually helps keep post-conversion haze low.
The extruder screw should provide enough distributive mixing without excessive shear heating. A Maddock or similar mixing section can help, but high melt temperatures can degrade the carrier or additives and create gels. Running the extruder at a stable, moderate temperature and using a finer screen pack also catches larger particles that would otherwise show up as fisheyes.
Yes, some nucleating or clarifying masterbatches based on sorbitol-type clarifiers can enhance contact transparency and slightly improve stiffness. These are useful when the film needs to look glass-clear on shelf but also run at high speed on form-fill-seal lines. However, they need to be checked for interaction with slip and antiblock packages to avoid haze from incompatible additives.
A small-scale cast film trial is the most reliable. Measure haze, clarity, gloss, coefficient of friction, and blocking force at the target gauge. Also inspect the film under polarized light or a microscope for additive agglomerates. It is worth running the film through a sealing test and checking haze again after 24 to 48 hours, because some optical issues only appear after additive migration.
Conclusion
Achieving high clarity in CPP film often comes down to tracing haze back to its less obvious sources. Beyond incompatibility or contamination, the choice of carrier resin in a masterbatch can make or break transparency. A carrier that closely matches the base polypropylene—especially a random copolymer with similar melt flow—reduces interfacial scattering and preserves the film's optical uniformity. Equally critical is dispersion control. Poorly dispersed pigments or additives form micro-agglomerates that scatter light, adding visible haze even when the individual particles are theoretically transparent. For high-clarity packaging, invest in masterbatches produced with optimized screw geometry or pre-dispersed additive packages to ensure every particle remains below the wavelength of visible light.
Antiblock additives present a well-known trade-off. Inorganic particles like silica improve handling but can degrade clarity if their refractive index differs too much from polypropylene or if the particle size distribution is too broad. For ultra-thin transparent CPP, this becomes especially acute: oversized antiblock particles act as haze centers and can even create micro-voids during stretching. The recommendation is to select narrow particle size distributions with a mean diameter below 2–3 microns, or to use organic antiblock alternatives where possible. Extrusion temperature also has a subtle but real effect on gloss. Overly high melt temperatures can cause additive decomposition or surface migration, while too low temperatures lead to poor dispersion and melt fracture. For ultra-thin films, formulators should raise masterbatch concentration slightly but reduce total let-down ratio, allowing lower processing temperatures and shorter residence times. The result is a balanced formulation where carrier compatibility, dispersion quality, controlled antiblock, and a tight thermal window work together to deliver the clarity that premium packaging demands.
Contact Us
Contact Person: JACK
Email: [email protected]
Tel/WhatsApp: 86 18650130917
Website: https://www.xinwancai.com/